Plugin compile and package
1. Service entry
- Web UI:
http://虚拟机ip:8008/ - Health check:
http://虚拟机ip:8008/api/health
2. Before you start
After you open the compile and package web app, the top of the page has three tabs:
客户端插件: compile and package HMI / client plugins.控制器插件: compile and package controller plugins.设置: clean build intermediates, upload temporary files, and manage generated packages.
The upper-right corner supports Chinese / English switching; after switching, page titles, buttons, hints, etc. update accordingly.
Page overview
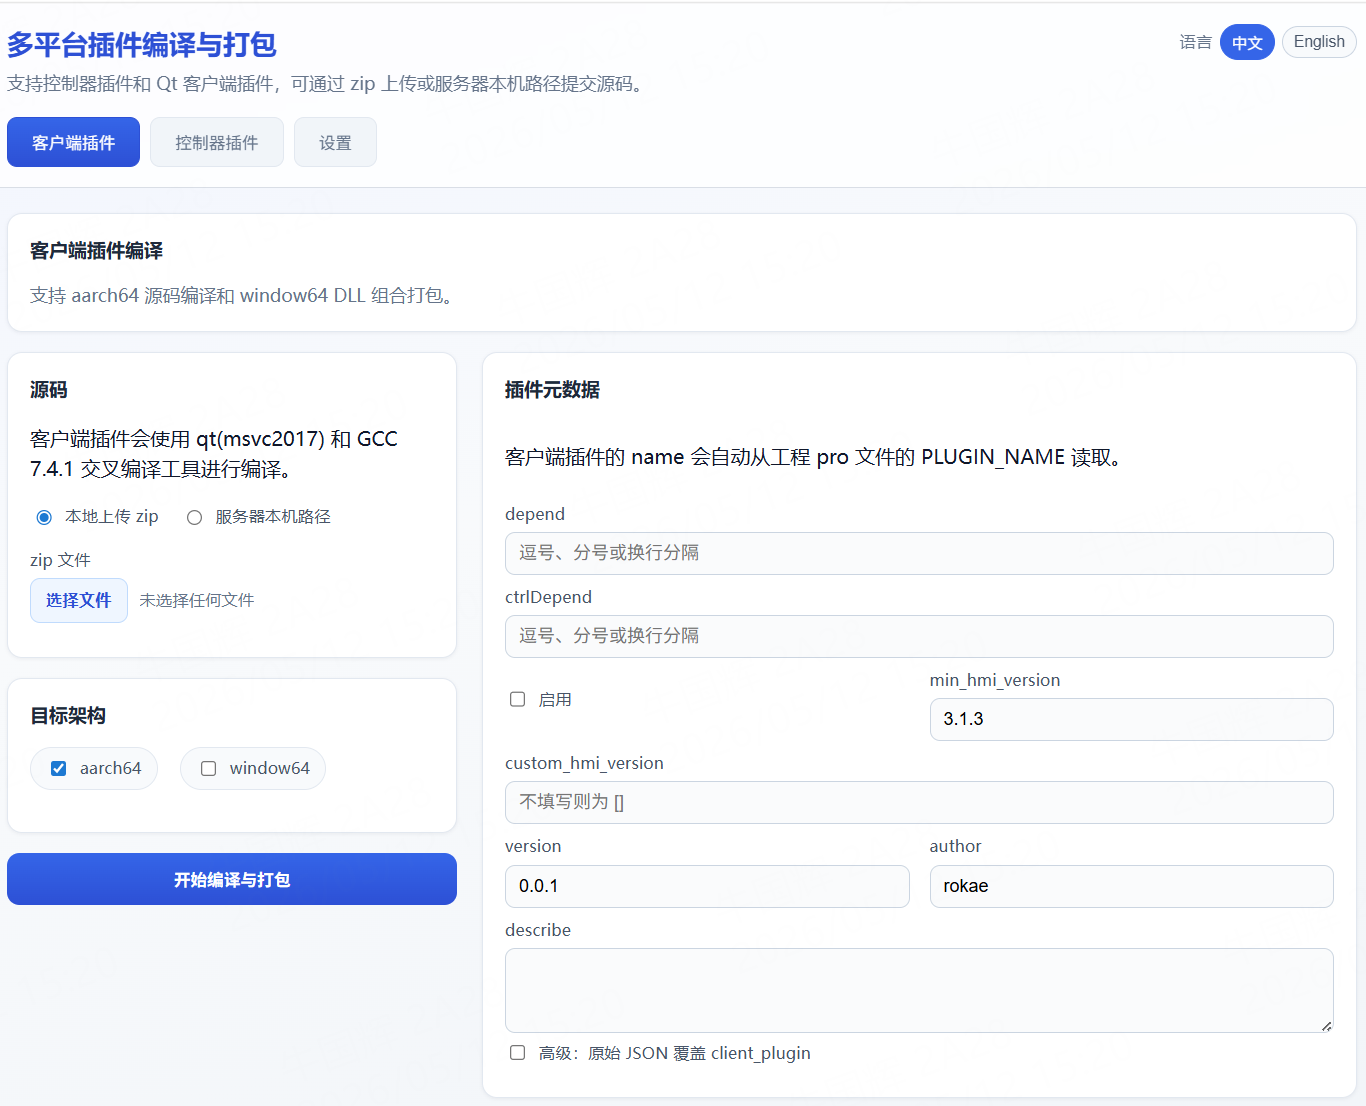
3. Client plugin compile and package
The Client plugin tab packages HMI / client plugins. It supports two platforms, aarch64 and window64:
aarch64: upload or point to client plugin source; the VM cross-builds with Qt 5.12.11 and GCC 7.4.1 to produce.so.window64: does not compile source; you upload the Windows-built plugin.dlland dependencyxplugin.dll, and the platform bundles them.aarch64 + window64: produces both Linux and Windows client plugins and puts them in one client plugin package.
3.1 Client plugin source requirements
When aarch64 is selected, client plugin source is required. You can submit source in either way:
- Upload a
zipsource archive - Enter an on-server local source path
Source project requirements:
- The project should include a Qt
.profile; the platform prefers finding a.proand building with qmake. - The
.promust definePLUGIN_NAME; the platform reads it as the client plugin name. - Source must include
lib/aarch64/xplugin.so; it is placed into the client plugin directory when packaging. - If no
.prois found, the platform triesCMakeLists.txtand treats the project as CMake.
If you only select
window64, you do not need to upload source or fill in an on-server source path.
Client plugin page
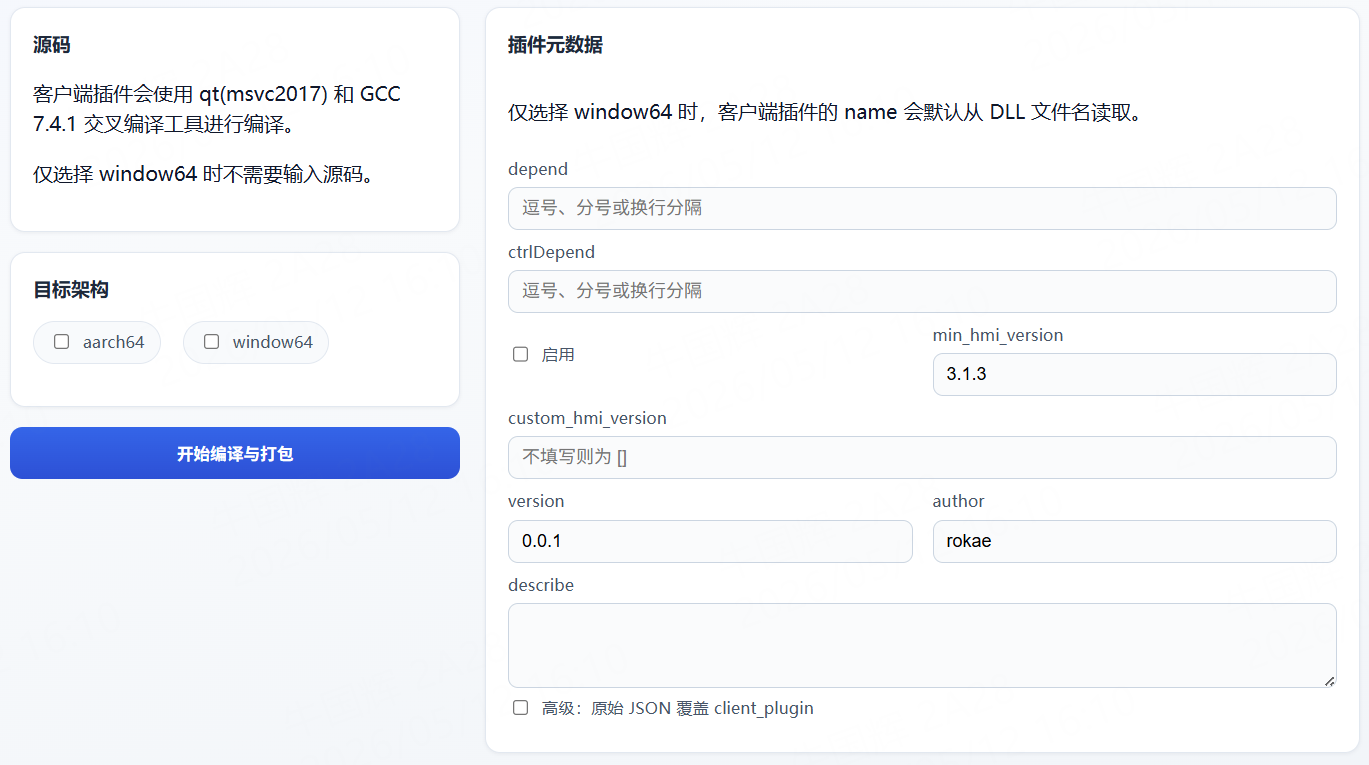
3.2 aarch64 source compile
Use this when you need to cross-compile the Linux client plugin inside the VM.
Steps:
- Open the Client plugin tab.
- Set target architecture to
aarch64. - In the Source area, choose Upload zip from local machine or On-server local path.
- If zip: upload an archive that contains your Qt client plugin project.
- If on-server path: enter the absolute source path on the VM.
- Fill in plugin metadata.
- Click Start compile and package.
aarch64 source input
Example path used here:
/home/rokae/rokae/xplugin/electricclawplugin/electricclawplugin-hmi.
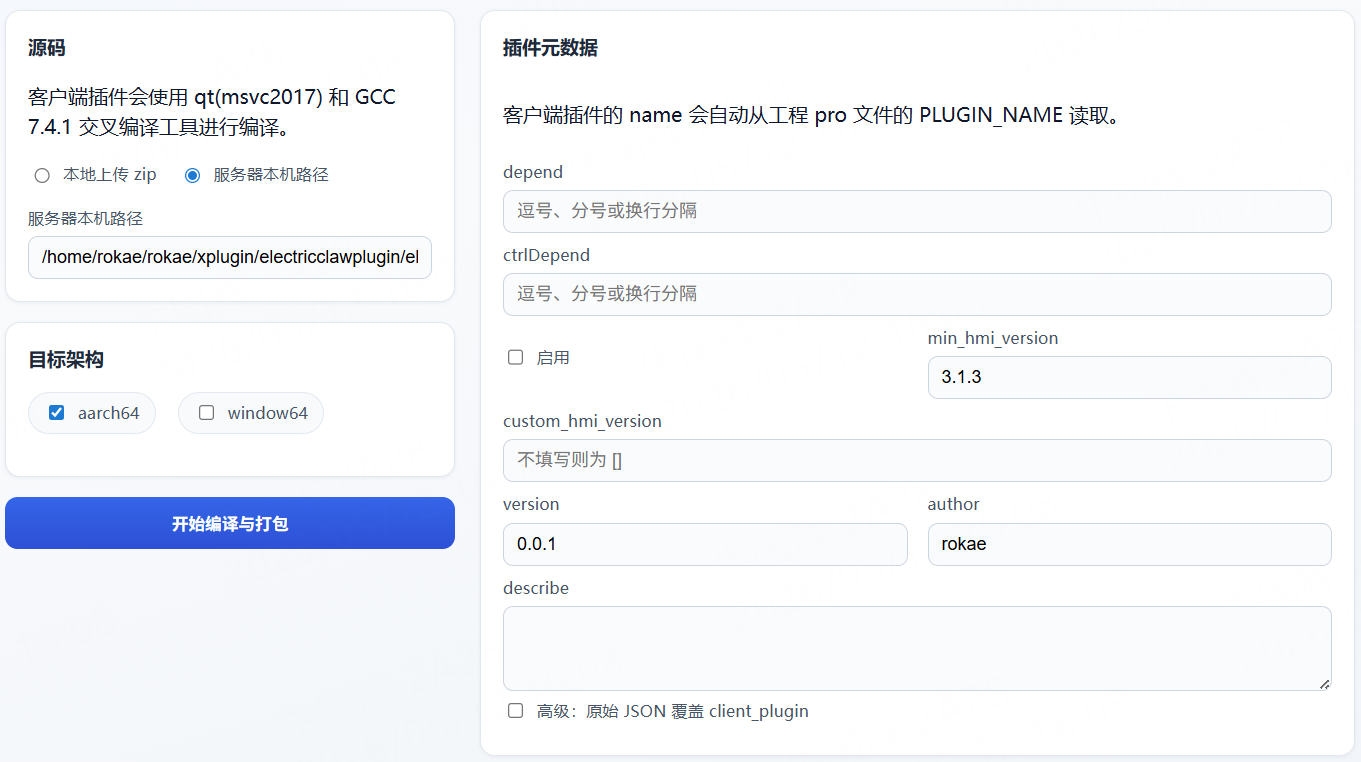
3.3 window64 DLL packaging
Use this when the Windows client plugin is already built on Windows and you only need a unified package from the platform.
Steps:
- Open the Client plugin tab.
- Set target architecture to
window64. - Upload the plugin DLL.
- Upload the dependency file
xplugin.dll. - Fill in plugin metadata.
- Click Start compile and package.
Notes:
- The dependency file name must be exactly
xplugin.dll. - If only
window64is selected, the plugin name is taken from the uploaded plugin DLL file name by default. - If only
window64is selected, the page does not ask for source input.
window64 DLL input
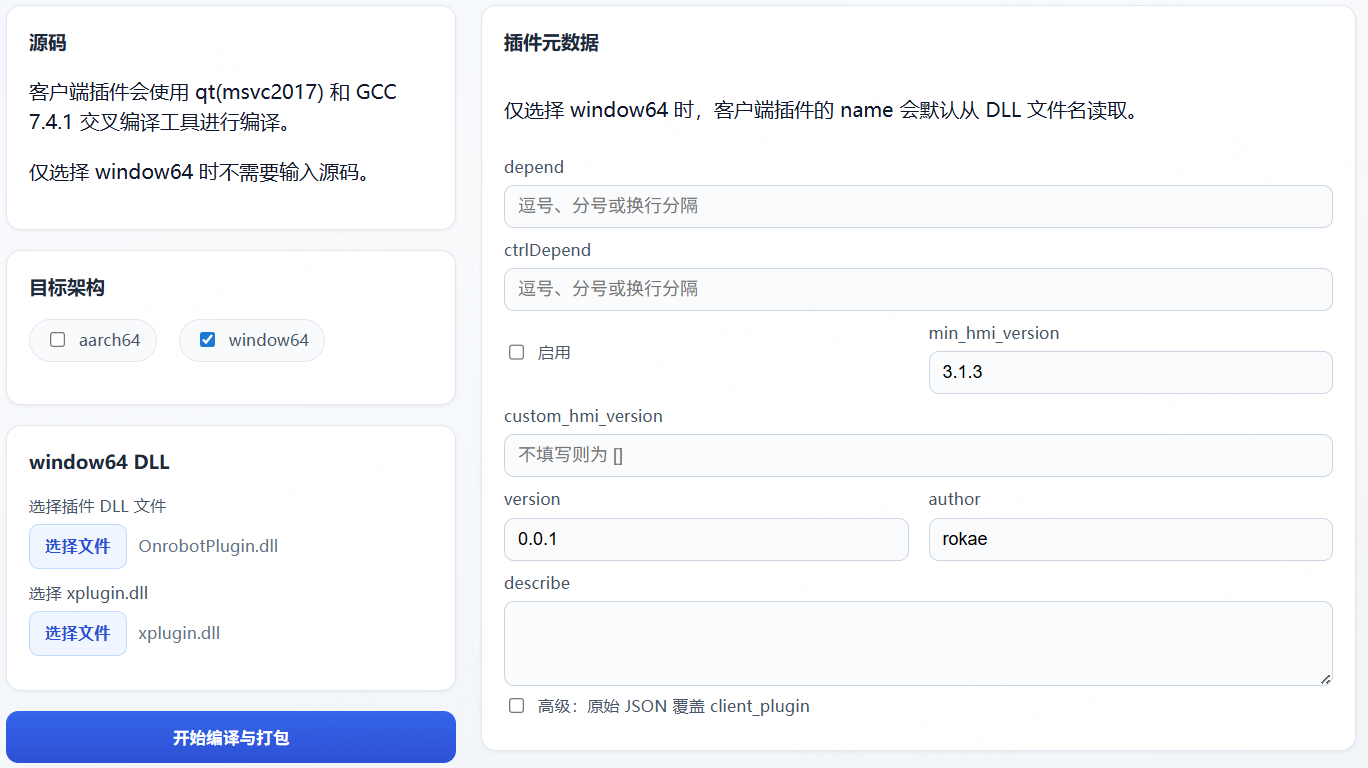
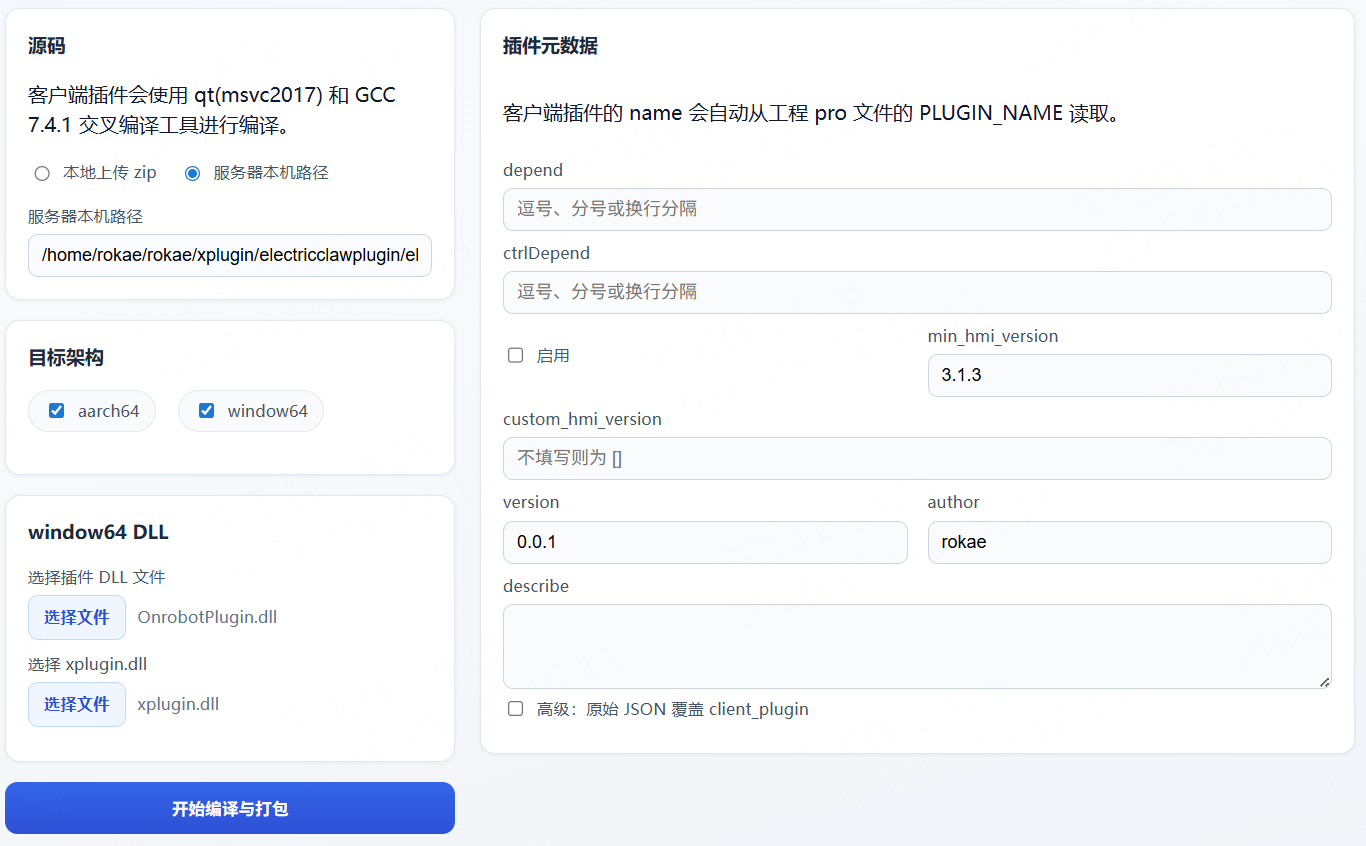
3.4 aarch64 + window64 combined packaging
When you need to ship both Linux and Windows client plugins, select both aarch64 and window64.
Steps:
- Select both
aarch64andwindow64as target architectures. - Provide aarch64 source (zip or on-server path).
- Upload the Windows plugin DLL.
- Upload
xplugin.dll. - Fill in plugin metadata and submit the job.
Dual-platform combined packaging
3.5 Client plugin metadata
Client plugin metadata fields:
depend: dependent client plugins; may be empty.ctrlDepend: dependent controller plugins; may be empty.启用: whether the plugin is enabled by default after install.min_hmi_version: minimum HMI version required by the plugin.custom_hmi_version: optional HMI version constraint.version,author,describe: shown in plugin information.
Client plugin name is usually read from PLUGIN_NAME in the project .pro; if only window64 is selected, it defaults to the uploaded plugin DLL file name.
3.6 Submit job and download
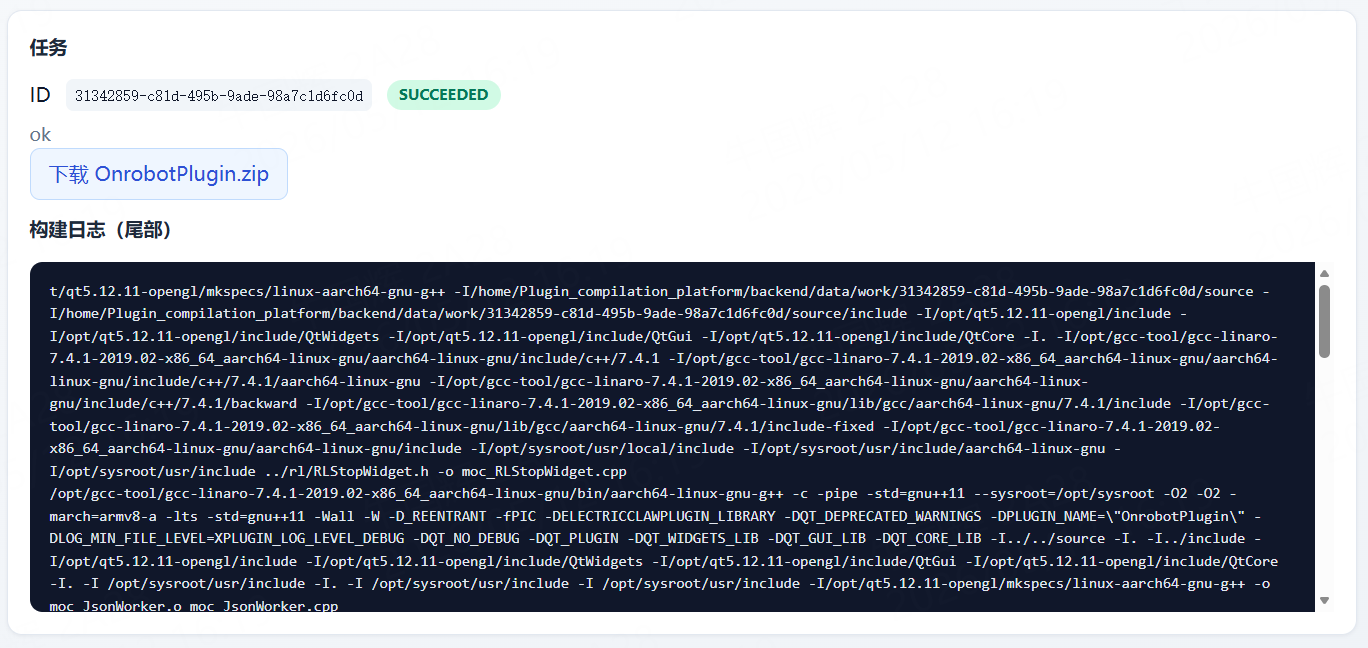
After submit, the page shows job ID, status, and build log:
pending: queuedrunning: buildingsucceeded: success; download availablefailed: failed; check the end of the log
When the job succeeds, click Download to get the client plugin package.
The downloaded client plugin file name is:
<plugin_name>.zip
The archive contains:
<plugin_name>.zip
└─ client.zip
Client plugin job status
3.7 Client plugin output layout
aarch64 only
<plugin_name>.zip
└─ client.zip
   └─ <plugin_name>/
      ├─ <plugin_name>.so
      ├─ <plugin_name>.lic
      ├─ <plugin_name>.json
      └─ xplugin.so
window64 only
<plugin_name>.zip
└─ client.zip
   └─ <plugin_name>/
      ├─ <plugin_name>.dll
      ├─ <plugin_name>.lic
      ├─ <plugin_name>.json
      └─ xplugin.dll
aarch64 + window64
<plugin_name>.zip
└─ client.zip
   ├─ aarch64/
   │  └─ <plugin_name>/
   │     ├─ <plugin_name>.so
   │     ├─ <plugin_name>.lic
   │     ├─ <plugin_name>.json
   │     └─ xplugin.so
   └─ win/
      └─ <plugin_name>/
         ├─ <plugin_name>.dll
         ├─ <plugin_name>.lic
         ├─ <plugin_name>.json
         └─ xplugin.dll
4. Controller plugin compile and package
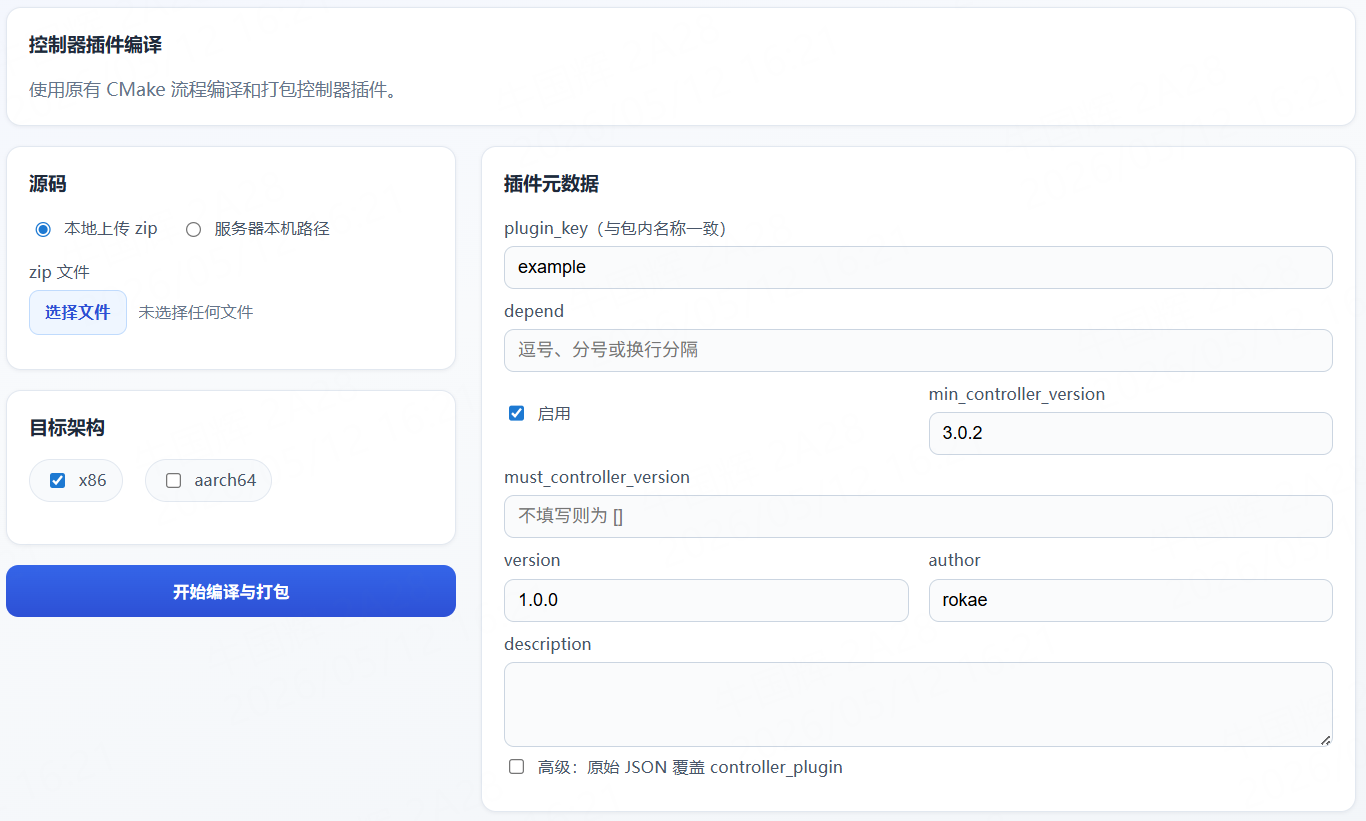
The Controller plugin tab compiles and packages controller plugins. Architectures supported: x86 and aarch64:
x86: build x86_64 controller plugin.aarch64: build aarch64 controller plugin.x86 + aarch64: build both and put them in one controller plugin package.
4.1 Controller plugin project layout
Recommended source layout (zip or on-server path is most common):
- The archive contains a
controller/directory. controller/CMakeLists.txtis the project root.- After build, it should produce the target plugin shared library (default match
**/*.so).
The backend prefers controller/ as the CMake source directory; if missing, it auto-detects an available CMakeLists.txt.
Controller plugin page
4.2 How to provide source
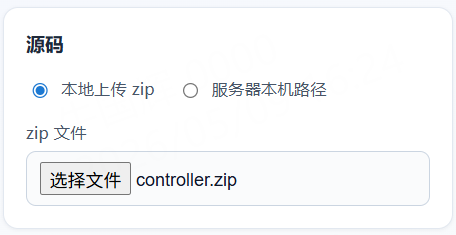
A. Upload zip from local machine
Good for one-off packaging or quick verification.
Key steps:
- In the Source area, choose Upload zip from local machine.
- Pick the source zip file.
- Choose target architecture(s).
- Fill in plugin metadata and submit.
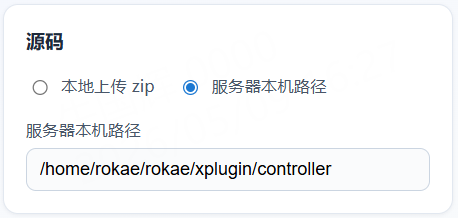
B. On-server local path
Good when source already exists on the server and you do not want to upload again.
Key steps:
- In the Source area, choose On-server local path.
- Enter the absolute path on the server, e.g.
/home/rokae/rokae/xplugin/controller. - Choose target architecture(s).
- Fill in plugin metadata and submit.
Note: this path is on the machine where the service runs, not the PC where the browser runs.
Controller plugin source input
4.3 Controller plugin metadata
Main fields:
depend: dependent plugins; may be empty.启用: whether the plugin is enabled by default after install.min_controller_version: minimum controller version required to run the plugin.must_controller_version: optional exact controller version constraint.version,author,description: shown in plugin information.
4.4 Submit job and download
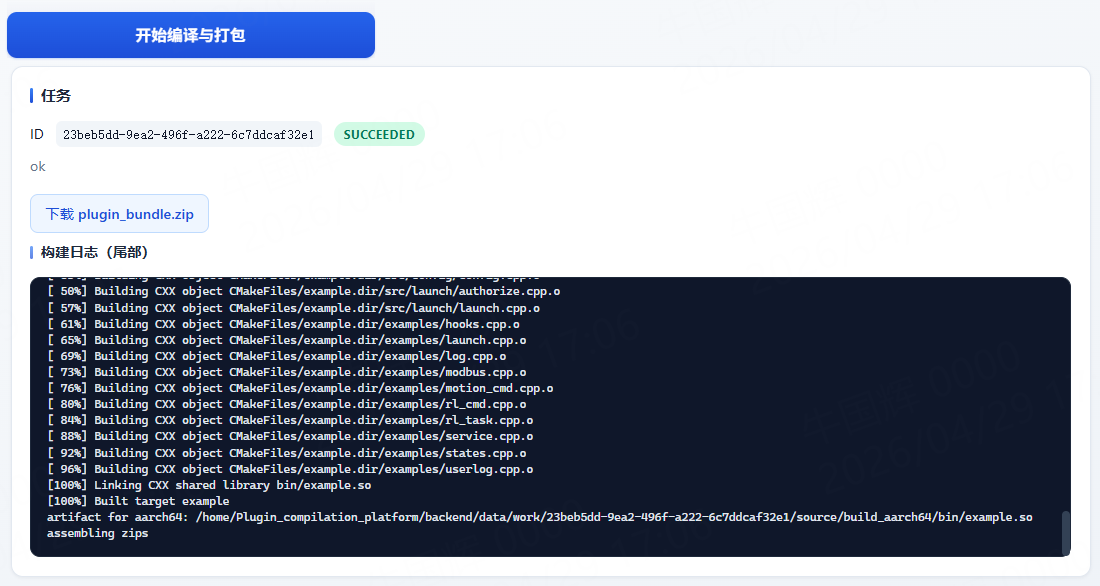
After submit, the page polls job status:
pending: queuedrunning: buildingsucceeded: success; download availablefailed: failed; check the end of the log
When it succeeds, click Download to get <plugin_key>.zip.
Controller plugin job status
4.5 Controller plugin output layout
The downloaded outer file is <plugin_key>.zip, which always contains controller.zip. Unzip controller.zip to get the plugin directory layout.
Single architecture (example: only x86)
<plugin_key>.zip
└─ controller.zip
   └─ <plugin_key>/
      ├─ <plugin_key>.so
      ├─ <plugin_key>.lic
      └─ <plugin_key>.json
Multi architecture (example: x86 + aarch64)
x86is shown asx86_64aarch64staysaarch64
<plugin_key>.zip
└─ controller.zip
   ├─ x86_64/
   │  └─ <plugin_key>/
   │     ├─ <plugin_key>.so
   │     ├─ <plugin_key>.lic
   │     └─ <plugin_key>.json
   └─ aarch64/
      └─ <plugin_key>/
         ├─ <plugin_key>.so
         ├─ <plugin_key>.lic
         └─ <plugin_key>.json
5. Plugin installation
For details, see HMI plugins->Installation and usage
6. Clear cache
You can clear cache on the
设置tab.
Clear cache